12-13-25
Flap installation
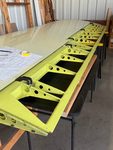
Prior to installation of the flaps/ailerons, I pre-drilled both the aileron and flap hinge arms and attach brackets to final size as I knew it would be quite difficult to drill them on the wing. After drilling, de-burring and painting these components, I cleaned the inside of each hinge arm until the bearing could be inserted with a snug but not tight fit.
The installation of the wing trailing edge area (wing tip, inboard skin wedge, flaps and ailerons) are all interrelated as each of them affects the final appearance of a straight line down the trailing edge of the wing.
I had previously located the wing tips and drilled all fastener holes to include drilling through the outboard trailing edge rib which is located closest to the aileron. This action turned out to be a mistake because when I placed the aileron into place the gap at the outboard trailing edge rib was not even. To solve this I had to fill the fastener holes in the fiberglass wing tip with resin and Cabosil (finely chopped fiberglass) and drill new holes with the rib in the correct position.
On my aircraft there is a small section of skin that must be located between the inboard end of the flap and the wing inboard edge (the "B" model Bearhawk eliminates this section and extends the flap all the way to the fuselage). The drawing was not very clear on which direction the rib flange must face for this skin section but I opted to install the rib closest to the flap in such a fashion that the rib presents a flat surface towards the flap rather than a recessed cavity.
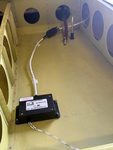
The drawing gives a specific lateral location for the flap measured at the flap outboard hinge bearing. I first removed the gussets on the flap upper and lower surface, then bolted the flap attach brackets to the rod ends placing an aluminum spacer measuring 0.593" to keep them parallel. Using some 2" clamps I placed the flap into the correct location (laterally) and clamped the attach brackets to the flap front spar. In order to drill the brackets I had to place one clamp from the top of the flap and a second clamp from the bottom.
To make sure the flap was aligned with the bottom of the wing, I placed two saw horses which fit perfectly under my wing and located them so the flap rested on the saw horses ensuring they were even with the bottom of the wing.
After drilling the brackets to the flap I will then proceed to locate the flaps in the fore / aft direction making sure it matches the wing profile.