Flap control mechanism
My kit had resided in Florida for a couple of years before I purchased it so I've been having to deal with minor surface corrosion on many components. The attached pictures show some of this corrosion as I did not clean it until after drilling the parts up.
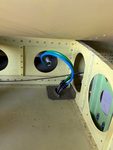
To install the flap control mechanism I started by asking a friend to use his 3-D printer to print a couple of tools from drawings available through Bearhawk Aircraft. These tools worked very well to locate the fastener holes in the control arms and to locate the torque tube into the proper position.
I proceeded to clean up the rotating surfaces where the torque tube would rotate inside the supports on both the torque tube and inside the supports. I used scotchbrite and cutting oil for this task. To clean inside the supports I used a long drill bit and taped a strip of scotchbrite to it then ran it through the hole.
After drilling the holes in the control arms, I then reassembled the control arms onto the torque tube, clamped the torque tube in the correct location using the previously printed tool and drilled the first hole through the torque tube. I then removed the whole assembly to drill the remaining holes and deburr them.
Author
This post is from Carl's 4-Place Bearhawk