Prep For Belts, Carpet and Seats
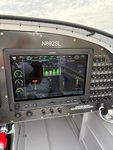
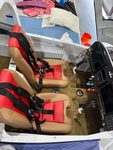
After my successful first engine run it was time to seal the two firewall pass-throughs containing wiring and control cables. Fire sleeve and hi temp RTV is used for this. Trying to fit the first inner layer of sleeving through a pass through stuffed with wiring and cables wasn't easy. I deviated from the plans a little. First, I made the fire sleeve sections shorter so they wouldn't protrude from the firewall forward as much. Then I used larger diameter fire sleeving on the outer layer that wrapped more easily around the wiring bundle. Lastly, I used dual hose clamps instead of safety wire to secure everything. The pass through on the upper left side of the firewall was pretty easy to deal with. The second one down by the oil cooler was a bitch getting at from underneath. On both you end up with a gooey, sticky mess when coating the inner part of the fire sleeve with red RTV and then trying to wrap the sleeve around the wire bundle and get hose clamps on and tightened. I spent a fair amount of time making sure the abrasive control cables and wiring were protected from each other. I also took the opportunity to do one last dive under my panel to triple check all wiring and make sure it was secured and free from chafing. I made several changes there and feel better about it. I also tweaked and fine-tuned all other wiring in the forward fuselage under the seats and in the tunnel while everything was still exposed. Then installed both control sticks and got the stick harnesses connected and secured. As the sticks move throughout their range there is significant bending and flexing that these harnesses endure. It's important that bending and flexing not be at the Molex connectors but below them. Also that the harnesses aren't snagging on the sticks or linkages as the move through their range of motion. This took some time and tweaking to get correct. Then it was time to install all the removable fuselage panels over the tunnel, under the seats and sticks and in the aft baggage compartment. This process looked simple, but like many things on the plane was more time consuming and difficult than expected. The sheer number of 8-32 machine screws involved, awkward locations of some panels and covers while trying to get a ratchet screwdriver on them proved challenging on some. In the end it all came out fine and I'm ready to move on with carpet and seat install.
This post is from Scott's RV-14 Build

